第23课:图形图像(1)
在.NET Framework类库中的System.Drawing命名空间及其子命名空间中,定义了大量的图形处理资源,本课将讨论常用类型的应用,并开始封装以毫米为单位的绘制类型——tImage类,后续课程还会逐渐扩展功能,包括基本图形和文本的绘制、扩展图形的绘制、任意角度的旋转等。
常用资源
本节介绍图形绘制的基本类型。
Bitmap类
Bitmap类用于处理位图对象,其中的Width和Height属性分别表示图像的宽度和高度,单位是像素。
图形处理中,DPI(dots per inch)是一个关于图像质量的参数,DPI值越高,图像就会越清晰,在Bitmap类中,可以使用SetResolution(xDpi, yDpi)方法设置图像的水平方向DPI和垂直方向DPI。
此外,Bitmap类中还可以直接操作像素,如使用SetPixel(x,y,color)方法绘制像素的颜色,其中,x和y指定像素坐标,color定义为Color对象,指定像素的颜色。相应的,需要获取一个像素的颜色时,可以使用GetPixel(x,y)方法。
需要将某一颜色设置为透明时,可以使用MakeTransparent(color)方法,此方法将图像中color参数指定的颜色转换为透明效果。
Graphics类
Graphics类封装了大量的绘制、交换等操作,应用时,首先需要将Graphics和Bitmap对象关联,如下面的代码。
| C# |
Bitmap bmp = new Bitmap(300,200);
Graphics g = Graphics.FromImage(bmp);
g.Clear(Color.White);
g.DrawLine(Pens.Black, 10,10,100,10);
|
代码的功能是创建一个宽度为300像素,高度为200像素的位置,然后将其与Graphics关联并将整个位置设置为白色,最后绘制一条黑色的线段。
稍后,封装tImage类时还会讨论更多的图形绘制方法和旋转等操作。
Color结构
Color结构可以处理RGBA颜色,包括红色值、绿色值、蓝色值和不透明度,这些值分别由0~255表示,其中,不透明度为0时表示完全透明,为255时表示完全不透明。
构建Color结构时,可以使用FromArgb()静态方法,它包括一些重载版本,如:
- FromArgb(int)方法使用一个整数表示颜色值,可以使用8位十六进制数表示,每两位一组,分别表示不透明度、红色、绿色和蓝色,如0xFFFF0000表示完全不透明的红色。
- FromArgb(int,int,int)方法用于创建不透明的RGB颜色,参数分别指定红色、绿色和蓝色,取值范围为0到255。
- FromArgb(int,int,int,int)方法的参数依次指定红色、绿色、蓝色和不透明色,取值范围为0到255。
- FromArgb(int,Color)方法将新的不透明度数据(参数一)添加到已存在的颜色(参数二)中。
KnownColor枚举中定义了一些颜色命名,可以通过这些颜色枚举值构建Color结构,Color.FromKnownColor(KnownColor.Red)可以创建红色结构;此外,也可以直接使用文本形式的颜色名称创建颜色,如Color.FromName("Red")同样可以创建红色结构。
读取颜色中的信息时,可以使用Color结构中的如下成员:
- ToArgb()方法,返回颜色的整数值(int类型)。
- ToKnownColor()方法,返回颜色的KnownColor枚举值。
- A、R、G、B定义为只读属性,分别表示颜色中的不透明度、红色、绿色和蓝色值,返回类型为byte(0~255)。
如果需要在方法的参数中使用默认值,直接使用Color结构是不行的,此时,可以通过int类型来传递颜色数据,如:
| C# |
void SetBackgroundColor(int color = 0xFFFFFFFF) {...}
|
请注意,如果表示颜色值的数值过大,需要强制转换为int类型,并使用unchecked()语法结构,如unchecked((int) 0xFFFFFFFF)。
此外,对于KnownColor枚举中定义的命名颜色,在Color结构中也都定义了相应的属性,如Color.Red属性可以直接获取红色结构数据。
Brush类
Brush类定义了格式刷的基类,在绘制填充图形或文本时,如果使用纯色的格式刷,可以使用两种基本方法,如果是KnownColor枚举中定义的命名颜色,可以使用Brushes类中的定义的相关属性获取格式刷对象,如Brushes.Red就是红色的格式刷;另一种方法是创建SolidBrush对象,并在构建函数中指定颜色,如new SolidBrush(Color.FromArgb(127,127,127))就创建了一个灰色的格式刷。
此外,System.Drawing.Drawing2D命名空间中还定义了一些常用的格式刷类型,如:
- HatchBrush类,定义指定样式和颜色的填充效果,构造函数中,参数一使用HatchStyle枚举中指定的填充图案类型,参数二指定颜色。
- LinearGradientBrush类定义线性渐变效果的格式刷,可以通过两点、矩形与方向来定义渐变效果。
- PathGradientBrush类定义路径渐变效果,可以通过GraphicsPath对象或一系列的点坐标指定渐变路径。
接下来了解这些格式刷的基本应用方法,首先是HatchBrush类,下面的代码创建了一个黑白格子填充的矩形。
| C# |
using System;
using System.Drawing;
using System.Drawing.Drawing2D;

public partial class Test : System.Web.UI.Page
{
    protected void Page_Load(object sender, EventArgs e)
    {
        Bitmap bmp = new Bitmap(200, 150);
        Graphics g = Graphics.FromImage(bmp);
        g.Clear(Color.White);
        //
        HatchBrush b =
            new HatchBrush(HatchStyle.LargeCheckerBoard,
            Color.White);
        g.FillRectangle(b, 0, 0, 200, 150);
        // 输出
        Response.ContentType = "image/png";
        Response.AppendHeader("Content-Disposition",
            "filename=img1.png;");
        bmp.Save(Response.OutputStream,
            System.Drawing.Imaging.ImageFormat.Png);
    }
}
|
代码生成效果如图1。
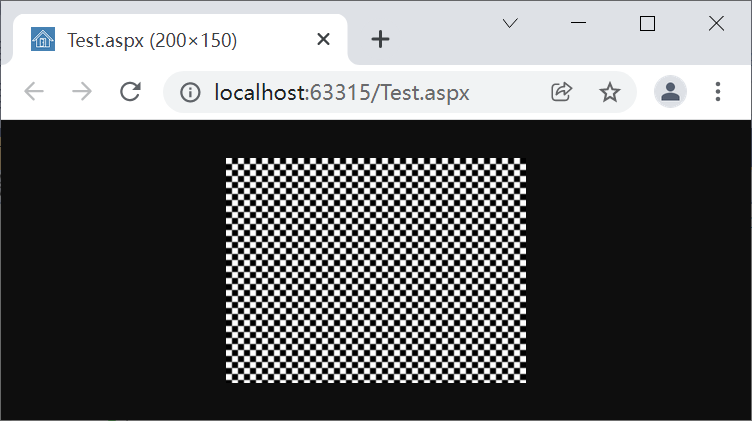
图1
本例,还需要注意图片在页面中的显示方式,再单独看一下这些代码。
| C# |
Response.ContentType = "image/png";
Response.AppendHeader("Content-Disposition", "filename=img1.png;");
bmp.Save(Response.OutputStream, System.Drawing.Imaging.ImageFormat.Png);
|
代码中,通过Response.ContentType属性设置图片类型,也就是图片的MIME类型,这里设置为PNG图片格式。
通过Response.AppendHeader()方法向页面添加了报文头数据,这里指定发送到客户端的文件为img1.png。
最后,通过Bitmap对象的Save()方法发送位图数据,请注意这里的保存路径是当前页面中的输出流(OutputStream);同时,设置图片格式为PNG。
LinearGradientBrush类定义了线性渐变格式刷,下面的代码使用两个点定义渐变方向。
| C# |
using System;
using System.Drawing;
using System.Drawing.Drawing2D;

public partial class Test : System.Web.UI.Page
{
    protected void Page_Load(object sender, EventArgs e)
    {
        Bitmap bmp = new Bitmap(200, 150);
        Graphics g = Graphics.FromImage(bmp);
        g.Clear(Color.White);
        //
        LinearGradientBrush b = new LinearGradientBrush(
            new Point(0, 0), new Point(200, 150),
            Color.White, Color.FromArgb(unchecked((int)0xFF333333)));
        g.FillRectangle(b, 0, 0, 200, 150);
        // 输出
        Response.ContentType = "image/png";
        Response.AppendHeader("Content-Disposition",
            "filename=img98.png;");
        bmp.Save(Response.OutputStream,
            System.Drawing.Imaging.ImageFormat.Png);
    }
}
|
代码会绘制一个从左上角到右下角渐变的矩形,颜色从白色到深一些的灰色,绘制效果如图2。
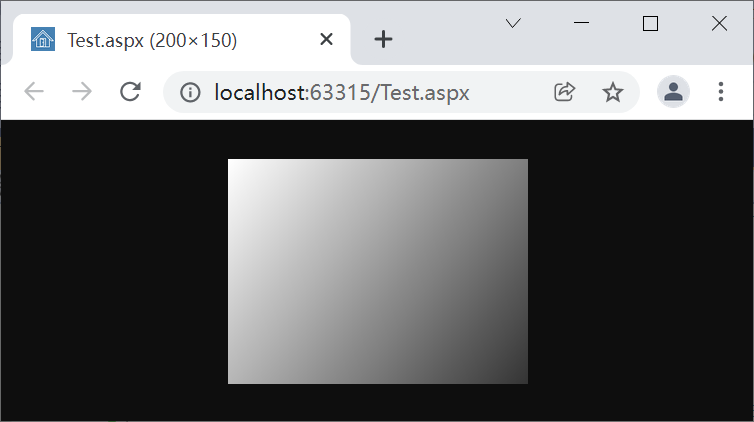
图2
下面的代码演示了PathGradientBrush类的应用。
| C# |
using System;
using System.Drawing;
using System.Drawing.Drawing2D;

public partial class Test : System.Web.UI.Page
{
    protected void Page_Load(object sender, EventArgs e)
    {
        Bitmap bmp = new Bitmap(200, 150);
        Graphics g = Graphics.FromImage(bmp);
        g.Clear(Color.White);
        //
        PathGradientBrush b = new PathGradientBrush(new Point[] {
            new Point(0,0),new Point(100,150),new Point(200,0) });
        g.FillRectangle(b, 0, 0, 200, 150);

        // 输出
        Response.ContentType = "image/png";
        Response.AppendHeader("Content-Disposition",
            "filename=img1.png;");
        bmp.Save(Response.OutputStream,
            System.Drawing.Imaging.ImageFormat.Png);
    }
}
|
绘制效果如图3。
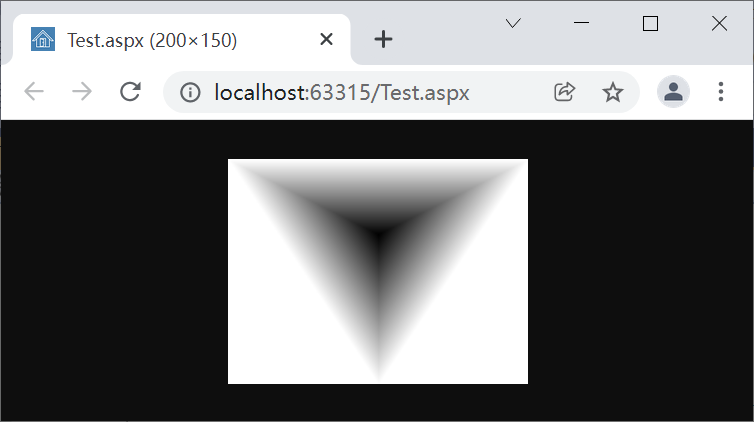
图3
Pen类
Pen类定义了画笔对象,在绘制线条类图形时使用,如线段、矩形、椭圆等;Pen类中基本的属性包括:
- Brush属性,指定填充线条的Brush对象。
- Color属性,指定线条的颜色。
- Width属性,指定线条的宽度,单位是像素。
- DashStyle属性,虚线样式。定义为DashStyle枚举类型,默认为Solid值,即绘制实线线条。
下面的代码演示了Pen类的应用。
| C# |
using System;
using System.Drawing;
using System.Drawing.Drawing2D;

public partial class Test : System.Web.UI.Page
{
    protected void Page_Load(object sender, EventArgs e)
    {
        Bitmap bmp = new Bitmap(400, 300);
        Graphics g = Graphics.FromImage(bmp);
        g.Clear(Color.White);
        //
        LinearGradientBrush b = new LinearGradientBrush(
            new Point(0, 0), new Point(0, 30),
            Color.White, Color.Black);
        Pen p = new Pen(b, 30);
        g.DrawRectangle(p, 10, 10, 390, 90);
        //
        p = new Pen(Color.Black, 10);
        p.DashStyle = DashStyle.Dash;
        g.DrawLine(p, 10, 200, 390, 200);
        // 输出
        Response.ContentType = "image/png";
        Response.AppendHeader("Content-Disposition",
            "filename=img1.png;");
        bmp.Save(Response.OutputStream,
            System.Drawing.Imaging.ImageFormat.Png);
    }
}
|
代码绘制效果如图4。
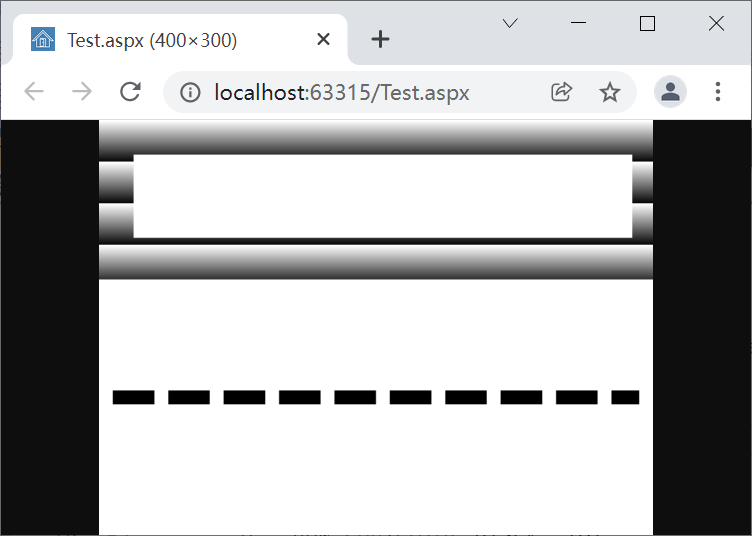
图4
此外,Pens类中还定义了一系列命名颜色的Pen对象,它们的线宽都是1像素,线条默认为实线(Solid)。
Font类
Font类定义了字体信息,创建Font对象时,可以使用多个版本的构造函数,主要的信息包括字体名称、尺寸、样式及应用的单位等。
如下面的代码就创建了一个Arial字体,尺寸为30像素,并有加粗和斜体样式。
| C# |
using System;
using System.Drawing;
using System.Drawing.Drawing2D;

public partial class Test : System.Web.UI.Page
{
    protected void Page_Load(object sender, EventArgs e)
    {
        Bitmap bmp = new Bitmap(400, 300);
        Graphics g = Graphics.FromImage(bmp);
        g.Clear(Color.White);
        //
        Font f = new Font("Arial", 30, FontStyle.Bold | FontStyle.Italic);
        g.DrawString("HELLO", f, Brushes.Black, 10, 10);
        // 输出
        Response.ContentType = "image/png";
        Response.AppendHeader("Content-Disposition",
            "filename=img1.png;");
        bmp.Save(Response.OutputStream,
            System.Drawing.Imaging.ImageFormat.Png);
    }
}
|
绘制效果如图5。
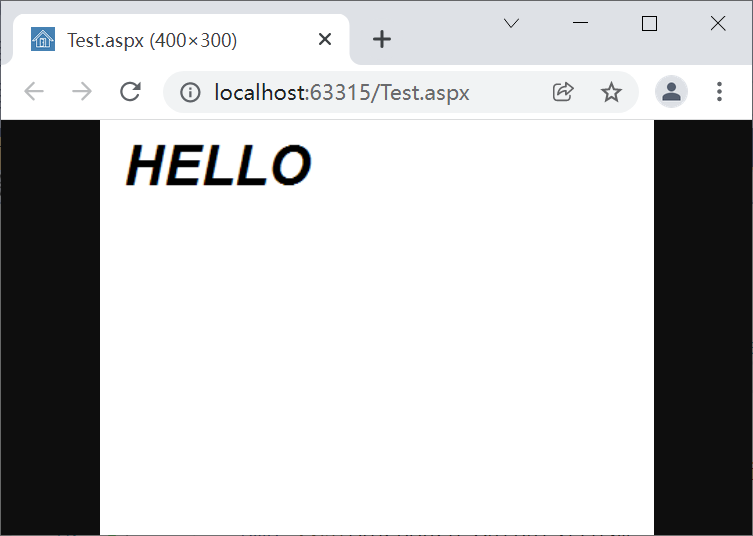
图5
使用Font对象时,还需要注意图形单位(GraphicsUnit),默认情况下使用的是像素(Pixel),在tImage类中,我们使用的单位是毫米,在指定字体时就可以将字体的单位设置为毫米,如下面的代码就创建了尺寸为5毫米的字体。
| C# |
Font f = new Font("Arial", 5, GraphicsUnit.Millimeter);
|
接下来,在tImage类的封装过程中会看到以上资源的更多应用。
tImage类基本定义
tImage类的主要功能是以毫米为单位进行图形绘制,并扩展了一些图形绘制和相关操作,如以中心对齐方式绘制正方形、圆形、等边三角形,以及图像任意角度的旋转等。
tImage类中会考虑图形的DPI设置;默认情况下,Bitmap对象的DPI是96,如果需要质量高一些的图像,需要将DPI设置到300以上,所以,tImage类中的默认DPI就是设置为300。tImage类封装文件位于/app_code/common/img/tImage.cs,下面是tImage类的基本定义。
| C# |
using System;
using System.Drawing;
using System.Drawing.Drawing2D;
using System.Drawing.Imaging;
using System.IO;

public class tImage :IDisposable
{
    public tImage(float width, float height, float dpi = 300F)
    {
        Dpi = dpi;
        dpmm = dpi / 25.4F;
        myBmp = new Bitmap((int)GetPx(width), (int)GetPx(height));
        myBmp.SetResolution(dpi, dpi);
        myG = Graphics.FromImage(myBmp);
        // 默认绘制数据
        DefPen = Pen0_3;
        DefBrush = Brushes.Black;
        DefFont = GetFont("Arial", 5F);
    }
    //
    public void Dispose()
    {
        myG = null;
        myBmp = null;
        GC.SuppressFinalize(this);
    }
    //
    protected Bitmap myBmp = null;
    protected Graphics myG = null;
    // 每英寸点数
    public float Dpi { get; private set; }
    // 每毫米点数
    private float dpmm;
    // 毫米单位宽度和长度
    public float GetWidth() { return GetMm(myBmp.Width); }
    public float GetHeight() { return GetMm(myBmp.Height); }
    // 像素尺寸
    public int GetPixelWidth() { return myBmp.Width; }
    public int GetPixelHeight() { return myBmp.Height; }
    // 毫米转像素pixel
    protected float GetPx(float mm)
    {
        return mm * dpmm;
    }
    // 像素转毫米
    protected float GetMm(float pixel)
    {
        return pixel / dpmm;
    }
    // Point转换
    protected PointF GetPx(PointF p)
    {
        return new PointF(GetPx(p.X), GetPx(p.Y));
    }
    protected PointF GetMm(PointF p)
    {
        return new PointF(GetMm(p.X), GetMm(p.Y));
    }
    // PointF数组转换
    protected PointF[] GetPx(PointF[] pts)
    {
        PointF[] result = new PointF[pts.Length];
        for (int i = 0; i < pts.Length; i++)
        {
            result[i] = GetPx(pts[i]);
        }
        return result;
    }
    protected PointF[] GetMm(PointF[] pts)
    {
        PointF[] result = new PointF[pts.Length];
        for (int i = 0; i < pts.Length; i++)
        {
            result[i] = GetMm(pts[i]);
        }
        return result;
    }
    //
    public void Clear(Color cl)
    {
        myG.Clear(cl);
    }
    public void Clear()
    {
        myG.Clear(Color.Transparent);
    }
    // 其它代码...
}
|
构造函数中需要设置图像的尺寸和DPI,这里,尺寸的单位使用毫米,DPI默认为300,使用此数据时,可以使用Dpi只读属性读取。dpmm字段数据为当前DPI下的每毫米点数(像素),用于像素和毫米单位之间的转换。
myBmp对象定义Bitmap类型,用于在内部处理图像;myG对象定义为Graphics类型,用于图形绘制等操作。
GetWidth()和GetHeight()方法以毫米为单位返回图像的尺寸;获取图片像素尺寸的宽度和高度时分别使用GetPixelWidth()和GetPixelHeight()方法。
GetPx()方法的功能是将毫米单位转换为像素,参数可以是单个值,也可以是PointF数组。
GetMm()方法的功能是将像素转换为毫米值,参数同样可以是单个数据或PointF数组。
Clear()方法用于清理图像,如果设置颜色,会将图像设置为此颜色,如果不设置颜色,则保持图像透明。
此外,在构造函数中还设置了一些默认的数据,这些辅助资源及相关操作定义如下。
| C# |
// 常用Pen对象,黑色,线宽0.1-1mm,1.5mm和2mm
public Pen Pen0_1 { get { return new Pen(Color.Black, GetPx(0.1F)); } }
public Pen Pen0_2 { get { return new Pen(Color.Black, GetPx(0.2F)); } }
public Pen Pen0_3 { get { return new Pen(Color.Black, GetPx(0.3F)); } }
public Pen Pen0_4 { get { return new Pen(Color.Black, GetPx(0.4F)); } }
public Pen Pen0_5 { get { return new Pen(Color.Black, GetPx(0.5F)); } }
public Pen Pen0_6 { get { return new Pen(Color.Black, GetPx(0.6F)); } }
public Pen Pen0_7 { get { return new Pen(Color.Black, GetPx(0.7F)); } }
public Pen Pen0_8 { get { return new Pen(Color.Black, GetPx(0.8F)); } }
public Pen Pen0_9 { get { return new Pen(Color.Black, GetPx(0.9F)); } }
public Pen Pen1_0 { get { return new Pen(Color.Black, GetPx(1F)); } }
public Pen Pen1_5 { get { return new Pen(Color.Black, GetPx(1.5F)); } }
public Pen Pen2_0 { get { return new Pen(Color.Black, GetPx(2F)); } }
// 默认操作对象
protected Pen DefPen = null;
protected Brush DefBrush = null;
protected Font DefFont = null;
//
public void SetPen(Color cl, float width)
{
    DefPen = new Pen(cl, GetPx(width));
}
public Pen GetPen(Color cl, float width)
{
    return new Pen(cl, GetPx(width));
}
public Pen GetPen()
{
    return DefPen;
}
//
public void SetBrush(Brush b)
{
    DefBrush = b;
}
//
public Font GetFont(string familyName, float size)
{
    return new Font(familyName, size, GraphicsUnit.Millimeter);
}
//
public Font GetFont(string familyName, float size, FontStyle fontStyle)
{
    return new Font(familyName, size, fontStyle, GraphicsUnit.Millimeter);
}
|
首先定义了一系列的Pen对象,颜色为黑色,宽度分别是0.1到1mm,以及1.5mm和2mm。
DefPen对象保存上次使用的Pen对象,默认为0.3毫米黑色。DefBrush对象保存上次使用的Brush对象,默认为黑色格式刷。DefFont对象保存上次使用的字体,默认为Arial字体,尺寸为5毫米。
SetPen()方法用于设置当前使用的Pen对象,参数包括颜色和宽度;设置的数据会保存在DefPen对象中。请注意,这里使用的宽度单位是毫米,方法中会使用GetPx()方法进行转换。
GetPen()方法用于创建新的Pen对象或返回DefPen。通过参数设置颜色和宽度可以创建当前图像适用的Pen对象;如果不设置参数,则返回DefPen对象。
SetBrush()方法用于设置默认的格式刷对象,数据保存到DefBrush对象。
GetFont()方法会根据字体名称、尺寸、风格信息创建当前对象使用的字体系对象。
获取tImage绘制的位图对象时,可以使用tImage.GetBitmap()方法,定义如下。
| C# |
public Bitmap GetBitmap(bool clone = false)
{
    if (clone) return (Bitmap)myBmp.Clone();
    else return myBmp;
}
|
方法中定义了一个参数,指定是否返回位图对象的副本,默认为false,会直接返回myBmp对象的引用。
接下来讨论具体的图形绘制。
绘制线条
线条是基本的图形,在tImage类中使用DrawLine()方法绘制,如下面的代码。
| C# |
// 线条
public void DrawLine(Pen p, float x1, float y1, float x2, float y2)
{
    myG.DrawLine(p, GetPx(x1), GetPx(y1), GetPx(x2), GetPx(y2));
    DefPen = p;
}
public void DrawLine(float x1, float y1, float x2, float y2)
{
    DrawLine(DefPen, x1, y1, x2, y2);
}
// 多线条绘制
public void DrawLines(Pen p, params PointF[] pts)
{
    myG.DrawLines(p, GetPx(pts));
    DefPen = p;
}
public void DrawLines(params PointF[] pts)
{
    DrawLines(DefPen,pts);
}
|
DrawLine()方法中,需要指定线条开始和结束的坐标位置,如果不指定Pen对象,则使用DefPen中的信息;指定Pen对象时,还会将其信息保存到DefPen对象。
DrawLines()方法用于绘制连续的线段,参数中需要指定线段的端点坐标。
下面的代码演示了线条绘制方法的应用。
| C# |
using System;
using System.Drawing;

public partial class Test : System.Web.UI.Page
{
    protected void Page_Load(object sender, EventArgs e)
    {
        tImage img = new tImage(200, 150, 300);
        img.Clear(Color.White);
        //
        img.SetPen(Color.Black, 1);
        img.DrawLine(10, 10, 190, 10);
        //
        img.DrawLines(new PointF[] {
            new PointF(10,50),new PointF(190,50),
            new PointF(190,80),new PointF(10,80)});
        // 输出
        Response.ContentType = "image/png";
        Response.AppendHeader("Content-Disposition",
            "filename=img1.png;");
        img.GetBitmap().Save(Response.OutputStream,
            System.Drawing.Imaging.ImageFormat.Png);
    }
}
|
代码绘制效果如图6。
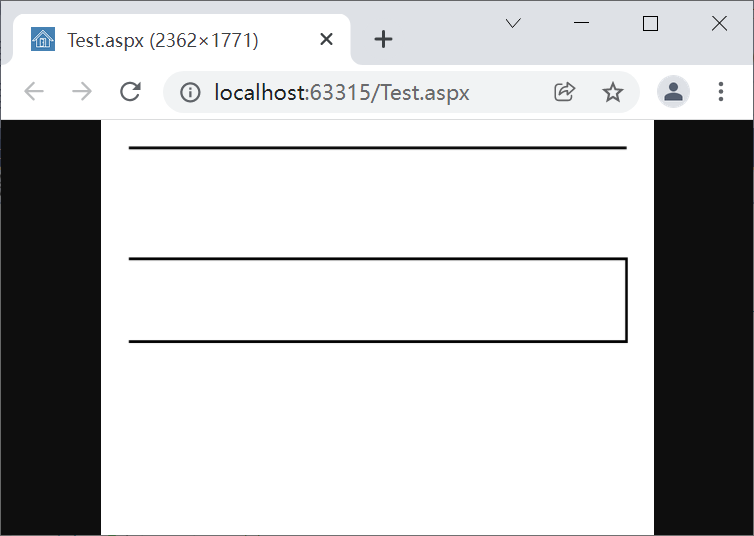
图6
默认情况下绘制的是实线,如果需要绘制点线或虚线,可以通过设置Pen对象的DashStyle属性实现,如下面的代码。
| C# |
using System;
using System.Drawing;
using System.Drawing.Drawing2D;

public partial class Test : System.Web.UI.Page
{
    protected void Page_Load(object sender, EventArgs e)
    {
        tImage img = new tImage(200, 150, 300);
        img.Clear(Color.White);
        //
        Pen pen1 = img.GetPen(Color.Black, 2F);
        pen1.DashStyle = DashStyle.Dot;
        img.DrawLine(pen1, 10, 10, 190, 10);
        //
        pen1.DashStyle = DashStyle.Dash;
        img.DrawLine(pen1, 10, 40, 190, 40);
        // 输出
        Response.ContentType = "image/png";
        Response.AppendHeader("Content-Disposition",
            "filename=img1.png;");
        img.GetBitmap().Save(Response.OutputStream,
            System.Drawing.Imaging.ImageFormat.Png);
    }
}
|
代码绘制效果如图7。
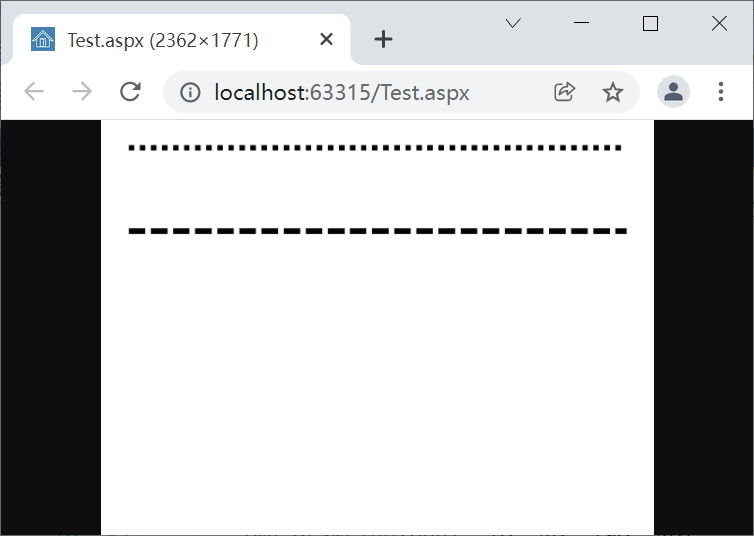
图7
此外,DashStyle枚举中定义的类型包括:
- Solid,实线,这是线条的默认样式。
- Dash,虚线。
- Dot,点线。
- DashDot,由短线和点循环的样式。
- DashDotDot,由一短线和两点循环的样式。
- Custom,自定义样式,需要使用Pen对象的DashPattern属性设置样式数据,定义为一个float数组,其中的数据定义长度比例,线条会按此模式循环绘制。
下面的代码演示了自定义样式的使用。
| C# |
using System;
using System.Drawing;
using System.Drawing.Drawing2D;

public partial class Test : System.Web.UI.Page
{
    protected void Page_Load(object sender, EventArgs e)
    {
        tImage img = new tImage(200, 150, 300);
        img.Clear(Color.White);
        //
        Pen pen1 = img.GetPen(Color.Black, 2F);
        pen1.DashStyle = DashStyle.Custom;
        pen1.DashPattern = new float[] { 1f,2f,3f,4f,5f,1f};
        img.DrawLine(pen1, 10, 10, 190, 10);
        // 输出
        Response.ContentType = "image/png";
        Response.AppendHeader("Content-Disposition",
            "filename=img1.png;");
        img.GetBitmap().Save(Response.OutputStream,
            System.Drawing.Imaging.ImageFormat.Png);
    }
}
|
绘制效果如图8。
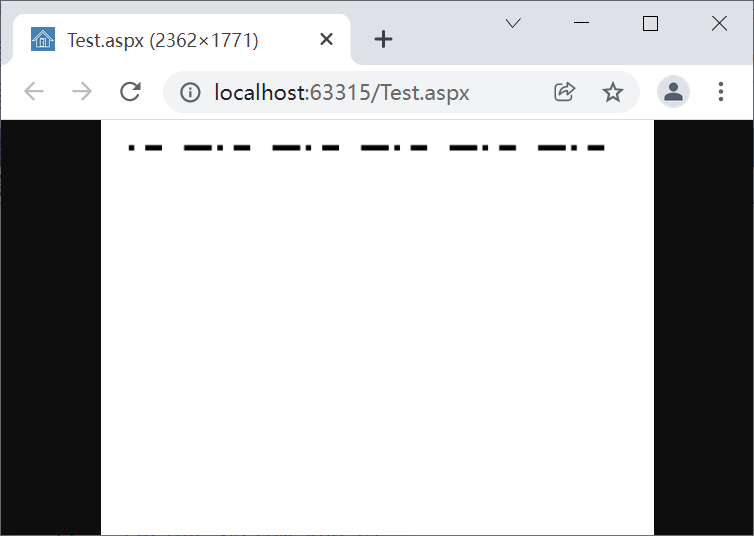
图8