第24课:图形图像(2)
本课讨论矩形、正方形、椭圆、圆形、弧线和扇形的绘制。
绘制矩形和正方形
使用Graphics对象中的DrawRectangle()方法绘制矩形时,所占用的空间在高度和宽度上都会比指定的数据多出一个线宽;如指定矩形宽度100像素、高度50像素,而线宽为6像素,则绘制的矩形实际占用的尺寸是宽度106像素、高度56像素。
如果需要严格控制矩形所占的尺寸,则需要进行相应的计算,在tImage类中,我们使用DrawRectangle()方法执行默认的绘制规则,而DrawRectangle1()方法则严格按照指定的坐标和尺寸绘制,即指定的宽度和高度包含了边框的尺寸,这种情况下,DrawRectangle1()方法绘制的矩形和FillRectangle()方法绘制的填充矩形可以完全重合。
首先来看tImage.DrawRectangle()方法的定义,如下面的代码。
| C# |
// 标准绘制方法
public void DrawRectangle(Pen p ,float x,float y,float width,float height)
{
    myG.DrawRectangle(p, GetPx(x), GetPx(y), GetPx(width), GetPx(height));
}
public void DrawRectangle(float x, float y, float width, float height)
{
    DrawRectangle(DefPen, x, y, width, height);
}
|
方法包括两个重载版本,当不指定Pen对象时,会使用DefPen对象数据作为绘制矩形的画笔(Pen)对象。
tImage.DrawRect()方法中会计算矩形左上角坐标与对应的宽度和高度数据,然后调用DrawRectangle()方法进行绘制,如下面的代码。
| C# |
// 矩形,严格控制绘制范围
public void DrawRectangle1(Pen p, float x, float y, float width, float height)
{
    float lineWidth = p.Width;
    float lineWidthHalf = lineWidth / 2;
    myG.DrawRectangle(p, GetPx(x) + lineWidthHalf, GetPx(y) + lineWidthHalf,
        GetPx(width) - lineWidth, GetPx(height) - lineWidth);
    DefPen = p;
}
public void DrawRectangle1(float x, float y, float width, float height)
{
    DrawRectangle1(DefPen, x, y, width, height);
}
|
最后是填充矩形的绘制,我们使用tImage.FillRectangle()方法,其绘制相对简单,只需要转换单位后调用Graphics.FillRectangle()方法,定义如下。
| C# |
// 填充矩形
public void FillRectangle(Brush b, float x, float y, float width, float height)
{
    myG.FillRectangle(b, GetPx(x), GetPx(y), GetPx(width), GetPx(height));
    DefBrush = b;
}
public void FillRectangle(float x, float y, float width, float height)
{
    FillRectangle(DefBrush, x, y, width, height);
}
|
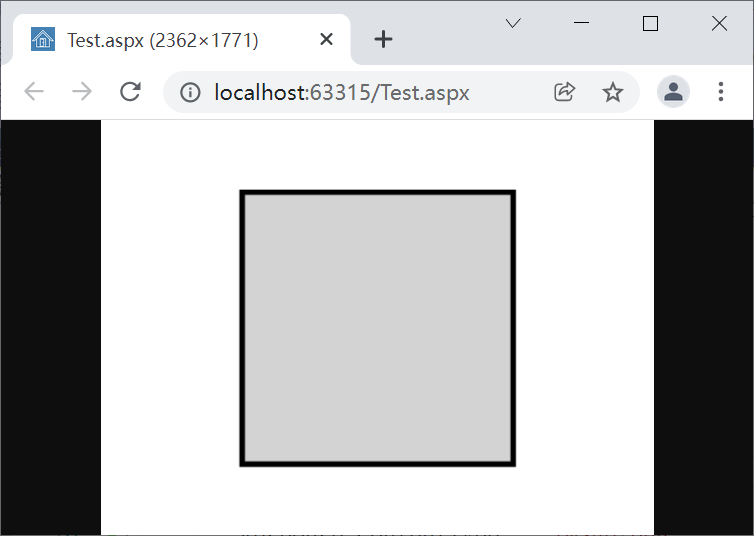
下面的代码演示了矩形的绘制操作,可以看到,使用相同尺寸数据绘制的线条矩形和填充矩形实际占用空间是相同的。
| C# |
using System;
using System.Drawing;

public partial class Test : System.Web.UI.Page
{
    protected void Page_Load(object sender, EventArgs e)
    {
        tImage img = new tImage(200, 150, 300);
        img.Clear(Color.White);
        //
        img.SetPen(Color.Black, 2);
        img.SetBrush(Brushes.LightGray);
        img.FillRectangle(10, 10, 150, 100);
        img.DrawRectangle1(10, 10, 150, 100);
        // 输出
        Response.ContentType = "image/png";
        Response.AppendHeader("Content-Disposition",
            "filename=img1.png;");
        img.GetBitmap().Save(Response.OutputStream,
            System.Drawing.Imaging.ImageFormat.Png);
    }
}
|
绘制效果如图1。

图1
正方形是特殊的矩形,有些时候可能会需要根据中心坐标和边长进行绘制,在tImage类中定义了相应的绘制方法。这里约定,线条类正方形和填充正方形所占用的空间是相同的,即指定的边长包含了边框的尺寸。
DrawSquare()方法用于绘制正方形,定义如下。
| C# |
// 正方形,指定中心和边长
public void DrawSquare(Pen p, float cx, float cy, float side)
{
    float lineWidth = p.Width;
    float lineWidthHalf = lineWidth / 2;
    float x = GetPx(cx - side / 2) + lineWidthHalf;
    float y = GetPx(cy - side / 2) + lineWidthHalf;
    float realSide = GetPx(side) - lineWidth;
    myG.DrawRectangle(p, x, y, realSide, realSide);
    DefPen = p;
}
public void DrawSquare(float cx, float cy, float side)
{
    DrawSquare(DefPen, cx, cy, side);
}
|
tImage.FillSquare()方法用于绘制填充正方形,如下面的代码。
| C# |
// 填充正方形,指定中心和边长
public void FillSquare(Brush b, float cx, float cy, float side)
{
    float sideHalf = side / 2;
    float realSide = GetPx(side);
    myG.FillRectangle(b, GetPx(cx - sideHalf), GetPx(cy - sideHalf), realSide, realSide);
    DefBrush = b;
}
public void FillSquare(float cx, float cy, float side)
{
    FillSquare(DefBrush, cx, cy, side);
}
|
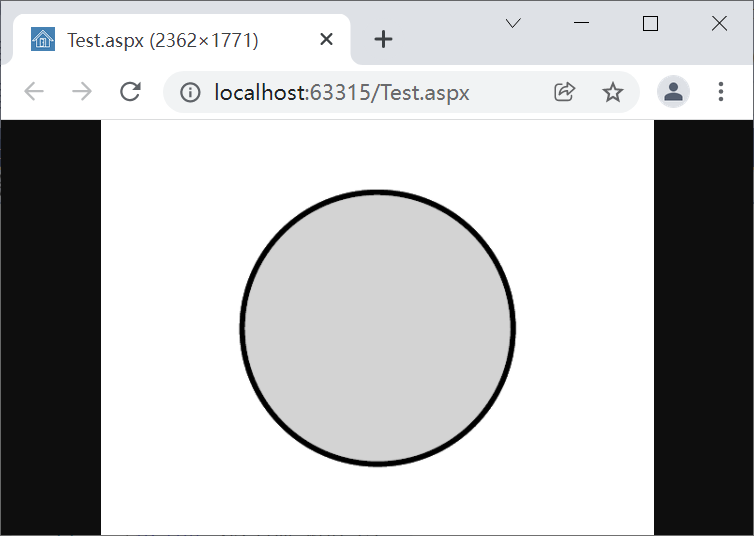
下面的代码演示了正方形的绘制。
| C# |
using System;
using System.Drawing;

public partial class Test : System.Web.UI.Page
{
    protected void Page_Load(object sender, EventArgs e)
    {
        tImage img = new tImage(200, 150, 300);
        img.Clear(Color.White);
        //
        img.SetPen(Color.Black, 2);
        img.SetBrush(Brushes.LightGray);
        img.FillSquare(100, 75, 100);
        img.DrawSquare(100, 75,  100);
        // 输出
        Response.ContentType = "image/png";
        Response.AppendHeader("Content-Disposition",
            "filename=img1.png;");
        img.GetBitmap().Save(Response.OutputStream,
            System.Drawing.Imaging.ImageFormat.Png);
    }
}
|
代码绘制效果如图2。

图2
绘制椭圆和圆形
绘制椭圆时,需要指定一个矩形区域数据,而绘制的椭圆是这个矩形的内切图形;和绘制矩形图形相似,在绘制椭圆时可以使用默认的绘制方式,也可以严格控制图形所占用的尺寸,使其完全位于指定区域的内部,如下面的代码。
| C# |
// 椭圆
public void DrawEllipse(Pen p ,float x,float y,float width,float height)
{
    myG.DrawEllipse(p, GetPx(x), GetPx(y), GetPx(width), GetPx(height));
    DefPen = p;
}
public void DrawEllipse(float x,float y,float width,float height)
{
    DrawEllipse(DefPen, x, y, width, height);
}
// 严格控制尺寸
public void DrawEllipse1(Pen p, float x, float y, float width, float height)
{
    float lineWidth = p.Width;
    float lineWidthHalf = lineWidth / 2;
    myG.DrawEllipse(p, GetPx(x) + lineWidthHalf, GetPx(y) + lineWidthHalf,
        GetPx(width) - lineWidth, GetPx(height) - lineWidth);
    DefPen = p;
}
public void DrawEllipse1(float x, float y, float width, float height)
{
    DrawEllipse1(DefPen, x, y, width, height);
}
// 填充椭圆
public void FillEllipse(Brush b, float x, float y, float width, float height)
{
    myG.FillEllipse(b, GetPx(x), GetPx(y), GetPx(width), GetPx(height));
    DefBrush = b;
}
public void FillEllipse(float x, float y, float width, float height)
{
    FillEllipse(DefBrush, x, y, width, height);
}
|
代码中,DrawEllipse()方法有两个版本,使用默认方式绘制椭圆;DrawEllipse1()方法绘制的椭圆则严格控制尺寸,即所有线条包含在指定的区域内;FillEllipse()方法则用于绘制填充椭圆。下面的代码演示了DrawEllipse1()和FillEllipse()方法的使用。
| C# |
using System;
using System.Drawing;

public partial class Test : System.Web.UI.Page
{
    protected void Page_Load(object sender, EventArgs e)
    {
        tImage img = new tImage(200, 150, 300);
        img.Clear(Color.White);
        //
        img.SetPen(Color.Black, 2);
        img.SetBrush(Brushes.LightGray);
        img.FillEllipse(10,10, 150, 100);
        img.DrawEllipse1(10,10, 150, 100);
        // 输出
        Response.ContentType = "image/png";
        Response.AppendHeader("Content-Disposition",
            "filename=img1.png;");
        img.GetBitmap().Save(Response.OutputStream,
            System.Drawing.Imaging.ImageFormat.Png);
    }
}
|
代码绘制效果如图3。

图3
Graphics类中并没有圆形的绘制方法,不过,可以将椭圆中的宽度和高度设置为相同来绘制圆形;方法定义如下。
| C# |
// 圆形,指定圆点和半径
public void DrawCircle(Pen p, float cx, float cy, float radius)
{
    float diameter = GetPx(radius * 2);
    myG.DrawEllipse(p, GetPx(cx - radius), GetPx(cy - radius),
        diameter, diameter);
    DefPen = p;
}
public void DrawCircle(float cx, float cy, float radius)
{
    DrawCircle(DefPen, cx, cy, radius);
}
//
public void DrawCircle1(Pen p, float cx, float cy, float radius)
{
    float lineWidth = p.Width;
    float lineWidthHalf = lineWidth / 2;
    float diameter = GetPx(radius * 2) - lineWidth;
    myG.DrawEllipse(p, GetPx(cx - radius) + lineWidthHalf,
        GetPx(cy - radius) + lineWidthHalf,
        diameter,
        diameter);
    DefPen = p;
}
public void DrawCircle1(float cx, float cy, float radius)
{
    DrawCircle1(DefPen, cx, cy, radius);
}
// 填充圆形
public void FillCircle(Brush b, float cx, float cy, float radius)
{
    float width = GetPx(radius * 2);
    myG.FillEllipse(b, GetPx(cx - radius), GetPx(cy - radius), width, width);
    DefBrush = b;
}
public void FillCircle(float cx, float cy, float radius)
{
    FillCircle(DefBrush,cx, cy, radius);
}
|
在封装的tImage类中,DrawCircle()方法使用标准方法绘制圆形,DrawCircle1()方法会严格控制图形尺寸,即圆形的线条将绘制在指定的范围内;FillCircle()方法绘制填充圆形。方法的参数需要指定Pen对象、圆心坐标和半径长度。
下面的代码代码演示了圆形的绘制操作。
| C# |
using System;
using System.Drawing;

public partial class Test : System.Web.UI.Page
{
    protected void Page_Load(object sender, EventArgs e)
    {
        tImage img = new tImage(200, 150, 300);
        img.Clear(Color.White);
        //
        img.SetPen(Color.Black, 2);
        img.SetBrush(Brushes.LightGray);
        img.FillCircle(100, 75, 50);
        img.DrawCircle1(100, 75, 50);
        // 输出
        Response.ContentType = "image/png";
        Response.AppendHeader("Content-Disposition",
            "filename=img1.png;");
        img.GetBitmap().Save(Response.OutputStream,
            System.Drawing.Imaging.ImageFormat.Png);
    }
}
|
代码绘制效果如图4。

图4
绘制弧线与扇形
绘制弧线和扇形时,需要一个抽象的椭圆,此时同样需要指定一个矩形的区域,包括左上角坐标、宽度和高度;然后,指定起始角度和旋转的角度。在tImage类中,同样会使用默认方式和严格尺寸方式分别绘制,其中,弧线绘制方法定义如下。
| C# |
// 弧线,标准方式
public void DrawArc(Pen p ,float x,float y,float width,float height,
    float startAngle,float sweepAngle)
{
    myG.DrawArc(p, GetPx(x), GetPx(y), GetPx(width), GetPx(height),
        startAngle, sweepAngle);
    DefPen = p;
}
public void DrawArc(float x, float y, float width, float height,
    float startAngle, float sweepAngle)
{
    DrawArc(DefPen, x, y, width, height, startAngle, sweepAngle);
}
// 弧线,严格尺寸
public void DrawArc1(Pen p, float x, float y, float width, float height,
    float startAngle, float sweepAngle)
{
    float lineWidth = p.Width;
    float lineWidthHalf = lineWidth / 2;
    float realX = GetPx(x) + lineWidthHalf;
    float realY = GetPx(y) + lineWidthHalf;
    float realWidth = GetPx(width) - lineWidth;
    float realHeight = GetPx(height) - lineWidth;
    myG.DrawArc(p, realX, realY, realWidth, realHeight, startAngle, sweepAngle);
    DefPen = p;
}
public void DrawArc1(float x, float y, float width, float height,
    float startAngle, float sweepAngle)
{
    DrawArc1(DefPen, x, y, width, height, startAngle, sweepAngle);
}
|
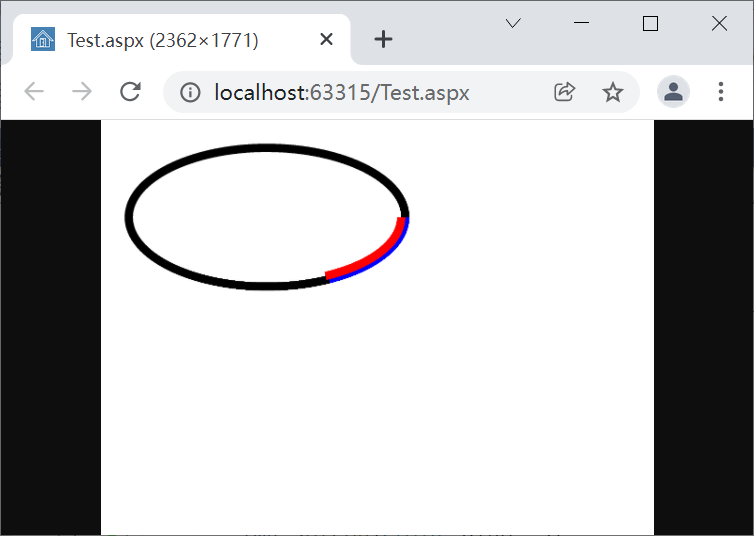
需要注意的是,在图形中,水平方向向右为0度,顺时针方向旋转为正角度,逆时针方向旋转为负角度。下面的代码演示了弧线的绘制,并显示了它在椭圆中的位置。
| C# |
using System;
using System.Drawing;

public partial class Test : System.Web.UI.Page
{
    protected void Page_Load(object sender, EventArgs e)
    {
        tImage img = new tImage(200, 150, 300);
        img.Clear(Color.White);
        //
        img.SetPen(Color.Black, 3);
        img.DrawEllipse(10, 10, 100, 50);
        img.SetPen(Color.Blue, 3);
        img.DrawArc(10, 10, 100, 50, 0, 45);
        img.SetPen(Color.Red, 3);
        img.DrawArc1(10, 10, 100, 50, 0, 45);
        // 输出
        Response.ContentType = "image/png";
        Response.AppendHeader("Content-Disposition",
            "filename=img1.png;");
        img.GetBitmap().Save(Response.OutputStream,
            System.Drawing.Imaging.ImageFormat.Png);
    }
}
|
代码绘制效果如图5。

图5
绘制扇形或填充扇形时,同样需要设置矩形数据、开始角度和旋转角度,在tImage类中,分别定义了使用标准方式和严格尺寸方式的扇形绘制方法,代码如下。
| C# |
// 扇形,标准方式
public void DrawPie(Pen p, float x, float y, float width, float height,
    float startAngle, float sweepAngle)
{
    myG.DrawPie(p, GetPx(x), GetPx(y), GetPx(width), GetPx(height),
        startAngle, sweepAngle);
    DefPen = p;
}
public void DrawPie(float x,float y,float width,float height,
    float startAngle,float sweepAngle)
{
    DrawPie(DefPen, x, y, width, height, startAngle, sweepAngle);
}
// 扇形,严格尺寸
public void DrawPie1(Pen p, float x, float y, float width, float height,
    float startAngle, float sweepAngle)
{
    float lineWidth = p.Width;
    float lineWidthHalf = lineWidth / 2;
    float realX = GetPx(x) + lineWidthHalf;
    float realY = GetPx(y) + lineWidthHalf;
    float realWidth = GetPx(width) - lineWidth;
    float realHeight = GetPx(height) - lineWidth;
    myG.DrawPie(p, realX, realY, realWidth, realHeight, startAngle, sweepAngle);
    DefPen = p;
}
public void DrawPie1(float x, float y, float width, float height,
    float startAngle, float sweepAngle)
{
    DrawPie1(DefPen, x, y, width, height, startAngle, sweepAngle);
}
|
填充扇形的绘制方法定义如下。
| C# |
// 填充扇形
public void FillPie(Brush b, float x, float y, float width, float height,
    float startAngle, float sweepAngle)
{
    myG.FillPie(b, GetPx(x), GetPx(y), GetPx(width), GetPx(height),
        startAngle, sweepAngle);
    DefBrush = b;
}
public void FillPie(float x, float y, float width, float height,
    float startAngle, float sweepAngle)
{
    FillPie(DefBrush, x, y, width, height, startAngle, sweepAngle);
}
|
下面的代码演示了扇形的绘制。
| C# |
using System;
using System.Drawing;

public partial class Test : System.Web.UI.Page
{
    protected void Page_Load(object sender, EventArgs e)
    {
        tImage img = new tImage(200, 150, 300);
        img.Clear(Color.White);
        //
        img.SetPen(Color.Black, 1);
        img.DrawEllipse1(10, 10, 100, 50);
        img.SetPen(Color.Blue, 1);
        img.DrawPie1(10, 10, 100, 50, 0, 45);
        img.FillPie(10, 10, 100, 50, 45, 45);
        // 输出
        Response.ContentType = "image/png";
        Response.AppendHeader("Content-Disposition",
            "filename=img1.png;");
        img.GetBitmap().Save(Response.OutputStream,
            System.Drawing.Imaging.ImageFormat.Png);
    }
}
|
代码绘制结果如图6。

图6